The data for this post is available http://sdrv.ms/1bhkrBq called “email data.csv”.
This post assumes that you have set up your Microsoft Outlook to send and receive messages.
- Open up a blank document.
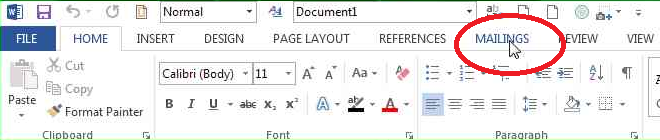
- Click on the “Mailings” tab in Word 2013.
- Click “Start Mail Merge” pulldown and then “Step by Step Mail Merge Wizard…”.

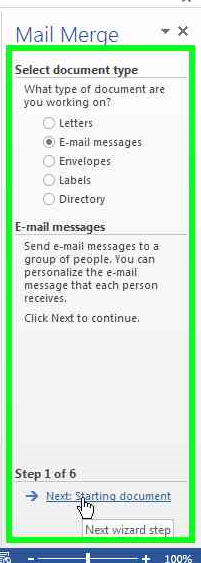
- Click “Step 1 of 6: Next Starting Document”.
 “
“ - Click “Step 2 of 6: Next Select Recpients”.

- Click “Browse …”
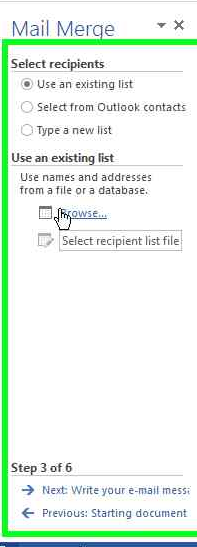
- Select “email data.csv”; and then, “Open”.

- Click on “Filter …” and “OK”.

-
Under “Field” select from the dropdown “group”.
Under “Comparison” select “equal to”.
Under “Compare to” type “Blue”. Other options are Red, Yellow, or Orange.
Then “OK”, “OK”.
-
The next stage is to write the email.
“Dear x, Your appointment has been made for y on Wednesday. Yours, Roger Smith.”
For x select from “Insert Merge Field” first_name; for y select time.


- Click on “Step 4 of 6: Review your email message”.

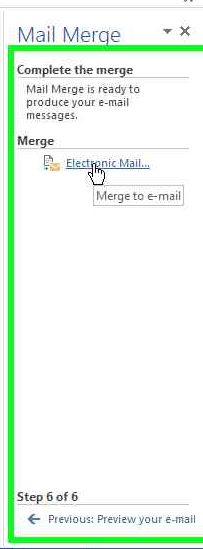
- Click “Step 5 of 6: Next Complete the Merge”.

-
Click “Electronic Mail …”
- Click “Fiish & Merge” pulldown on the ribbon then “Send Email Messages …”

- Type “Your Appointment” under “Subject Line” then “OK”.
The email has been sent to Outlook and double check all have been sent by clicking “Send All”.

- The emails in Outlook.

-
